- Menu Tips
- Creating a Menu
- Adding to the Menu
- Reordering the Menu
- Creating Sub Menus
- Removing Menu Items
Menu Tips
When it comes to creating a menu:
Keep it brief
Your menu Navigation Label doesn’t have to replicate your page title in its entirety. Whilst page titles can get away with being verbose, the same cannot be said for top level menu items, where space is limited. Note that it is possible to change the Navigation Label that is displayed in your menu by replacing the default content when creating your menus (more information below).
Consider Your Information Architecture (IA) / Menu Structure
Look for commonalities and groups of information when it comes to constructing your menu. For example, instead of adding Papers, Leaflets and Books as individual top level menu items, create a Publications menu item instead, with Papers, Leaflets and Books as sub menu items. This better categorises your site pages and leaves more room for other menu items.
Completely top level approach:

Sub menu approach:

Try to avoid the following situation at all costs:

The combination of too many menu items and / or overly long menu Navigation Labels can result in an unsightly menu where menu items wrap onto multiple lines.
Contact the Web Team at web-team@abdn.ac.uk if you wish to discuss your menu further.
Creating a Menu
WordPress provides the means to create multilevel / hierarchical menus.
You will access the WordPress Menu System through one of two ways:
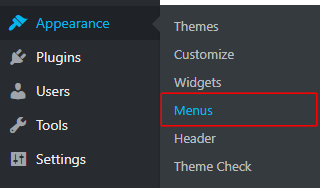
- Click the Appearance menu item and then Menus
OR
- Click the Menus menu item
The Menus screen will be displayed
To ensure that you have access to all elements:
- Click the Screen Options button at the top right of your screen

This displays additional Screen Options

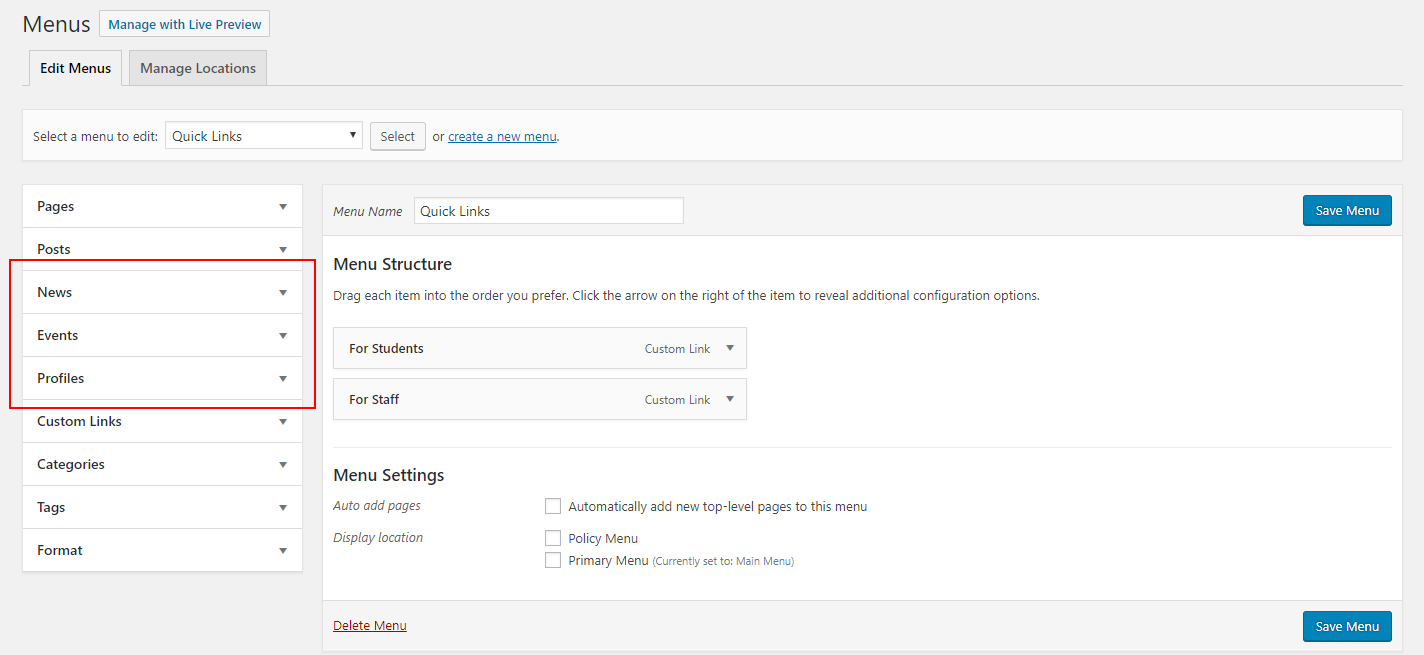
- Click News, Events and Profiles *** ONLY IF YOU USE THESE SECTIONS ON YOUR SITE ***
The selected options will appear in the list of available menu items
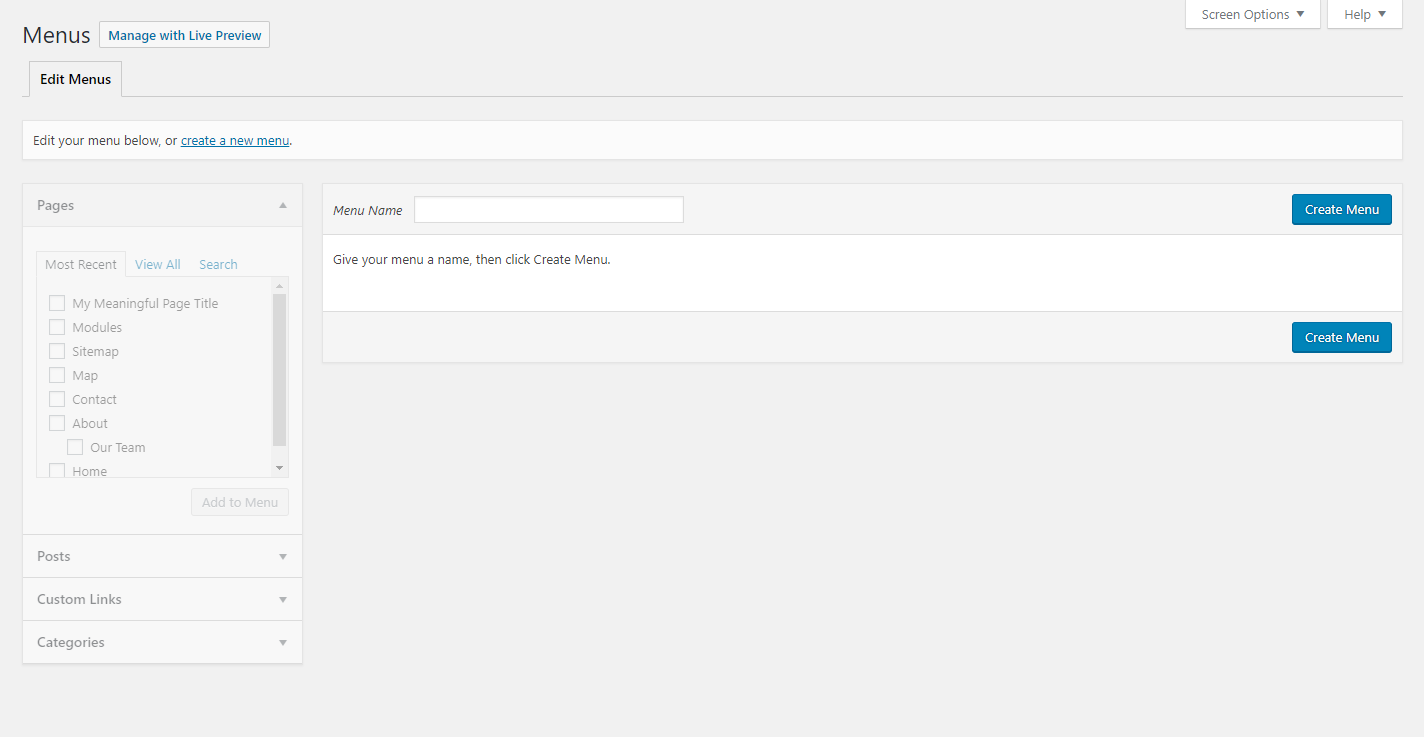
To create a new menu:
- Click the create a new menu link
- Enter a Menu Name

- Click the Create Menu button
The Menus screen changes to reflect that you now have an active menu
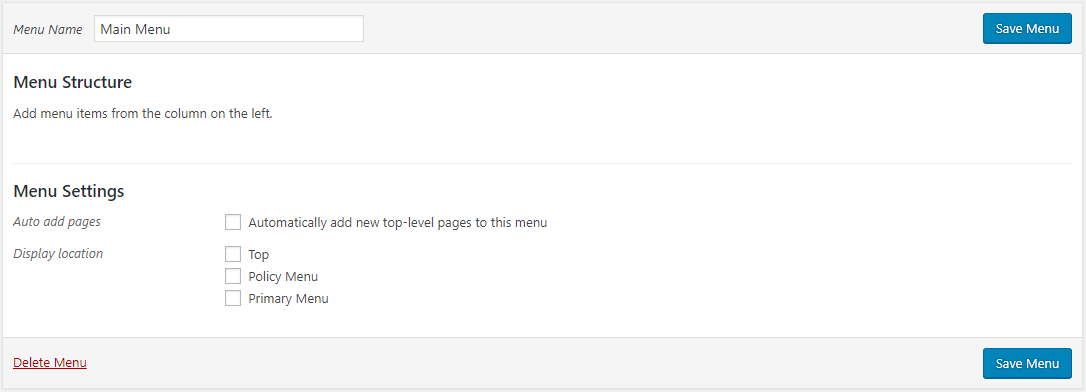
- Select the Display location for this particular menu i.e. for Main Menu, select Primary Menu as the Display location
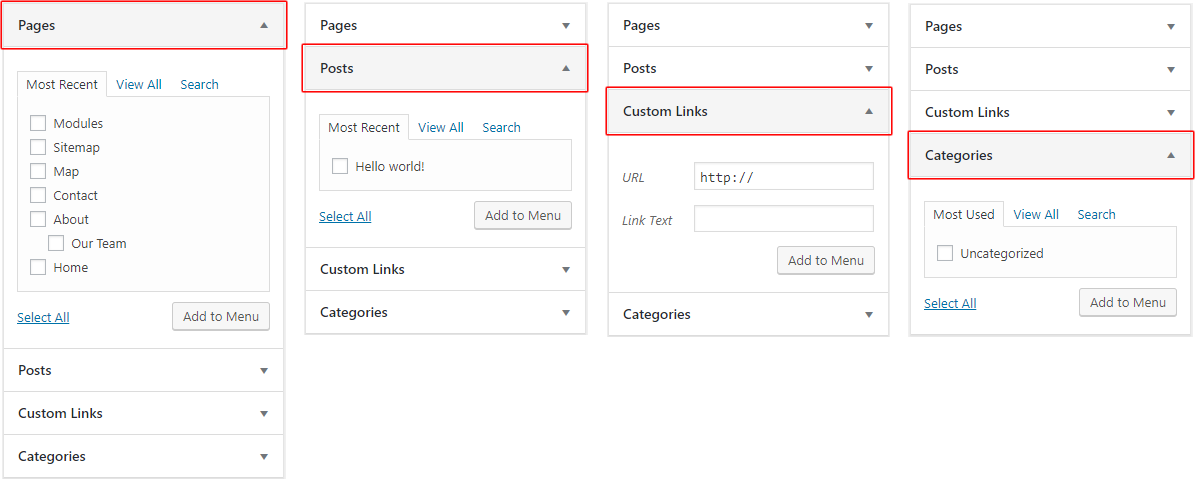
Note that it is possible to construct a WordPress menu from Pages, Posts, Custom Links and/or Categories. Typically, however, your menu will consist only of Pages. The only exception to this is likely to be News, Events and Profiles.
Adding To The Menu
- Click the Pages option if it is not already selected
- Click Select All or select individual pages, depending on your menu requirements
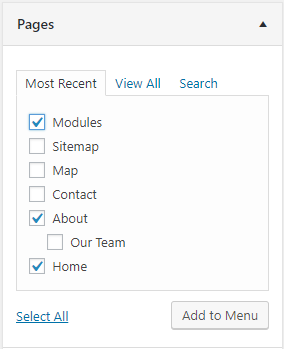
- Click the Add to Menu button
Your menu is constructed
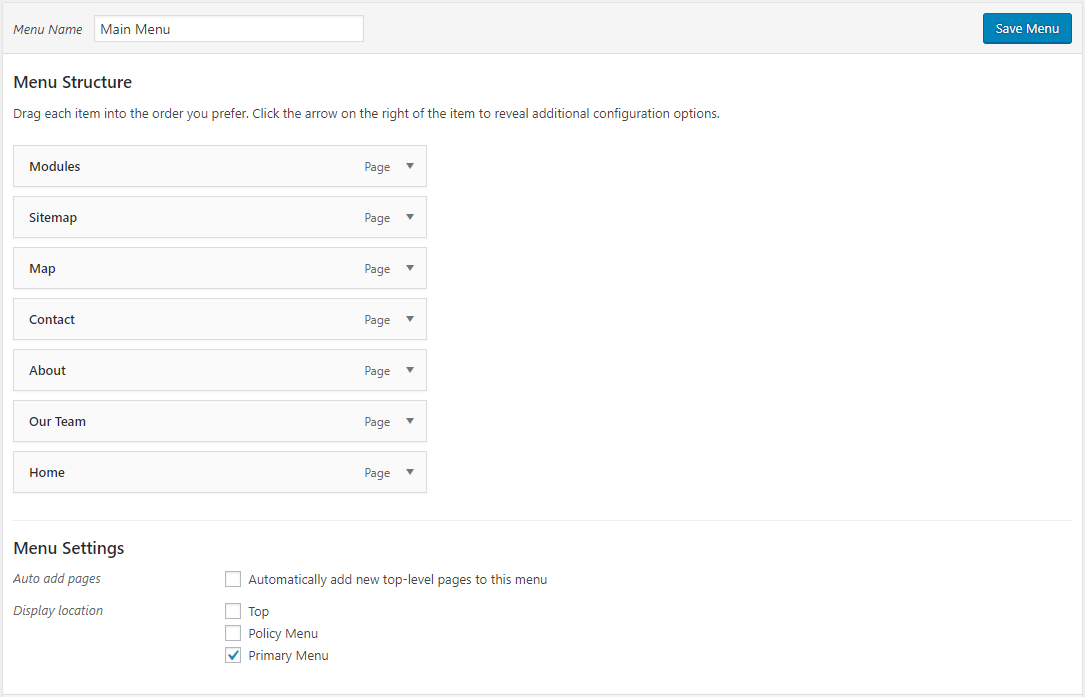
- Click the Save Menu button
To add News, Events and/or Profiles:
- Click the downward arrow for the item you wish to add i.e. News
By default, the Most Recent tab will display
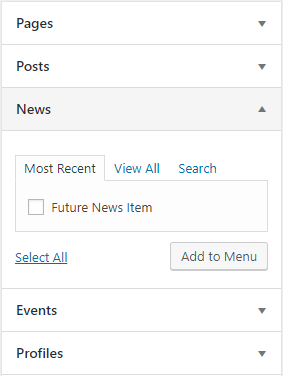
- Click the View All tab
- Select All News Items
- Click the Add to Menu button
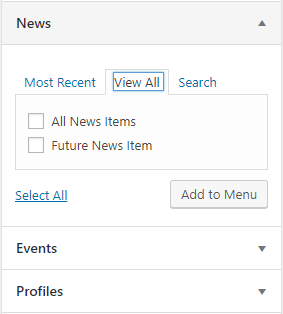
An All News Items menu item is added to your menu
Note that this is a Post Type Archive
As such, it will display a list of the respective Post Type in the same way that a blog displays all blog posts
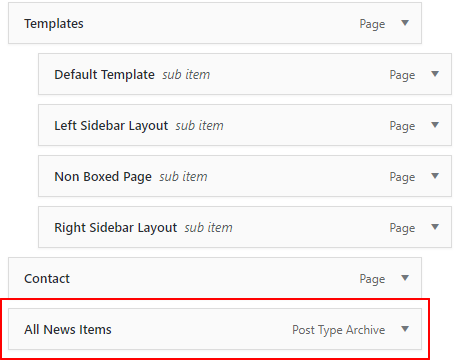
- Click the downward arrow next to Post Type Archive in the All News Items menu item

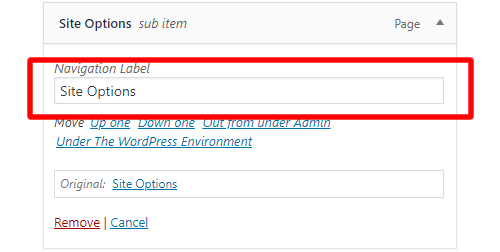
- Replace the All News Items text with News 1
- Repeat for Events and/or Profiles if required
- Click the Save Menu button
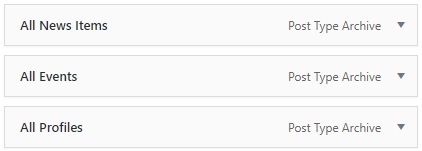
1 All News Items, All Events and All Profiles would instead be displayed as News, Events and Profiles in the menu. As such, we end up with the more succinct top menu instead of the verbose bottom menu, leaving more room for additional menu items if required:


Reordering the Menu
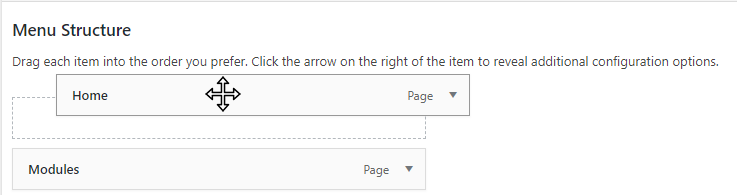
To reorder menu items:
- Left-click and hold the menu item to be moved
- Drag the menu item to its new location
A dashed box outline will show the position from where the menu has come initially, before quickly changing to show available positions
- Release the mouse button to drop it in place
- Click the downward arrow for the menu item that you wish to move
- Select from the available Move options
Note that these will vary depending on the current position of the menu item
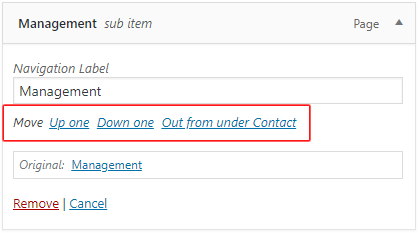
- Repeat as required
- Click the Save Menu button
Creating Sub Menu Pages
To create sub menu pages:
- Left-click and hold the menu item to be moved
- Drag the menu item underneath and slightly to the right of the parent menu item
A dashed box outline will show the position from where the menu has come initially, before quickly changing to show available positions. Note that the dashed box is indented
- Release the mouse button to drop it in place
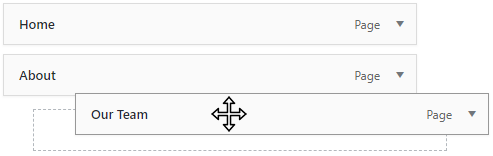
- Repeat as required
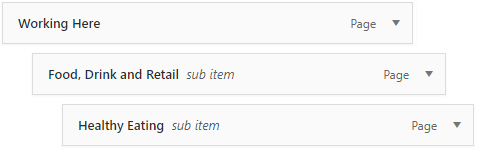
Note that you can create a multilevel / hierarchical menu by adding sub menus of sub menus and so forth:
- Click the Save Menu button
Removing Menu Items
To remove menu items:
- Click the downward arrow for the menu item that you wish to remove
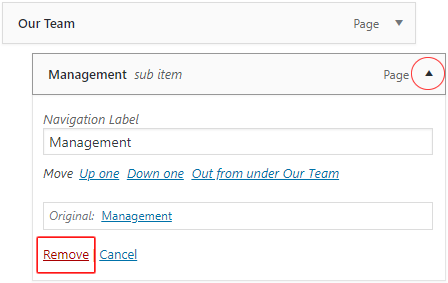
- Click Remove
- Repeat as required
- Click the Save Menu button